My family loves the Nintendo Switch, so you can imagine how disappointed my young son was when he could no longer turn to the left on Mario Kart.
The drifting stick had broken, I’m not sure how but anyway I didn’t fancy buying a new controller at £39.99, especially as I’d only recently paid £69.99 for an extra pair.
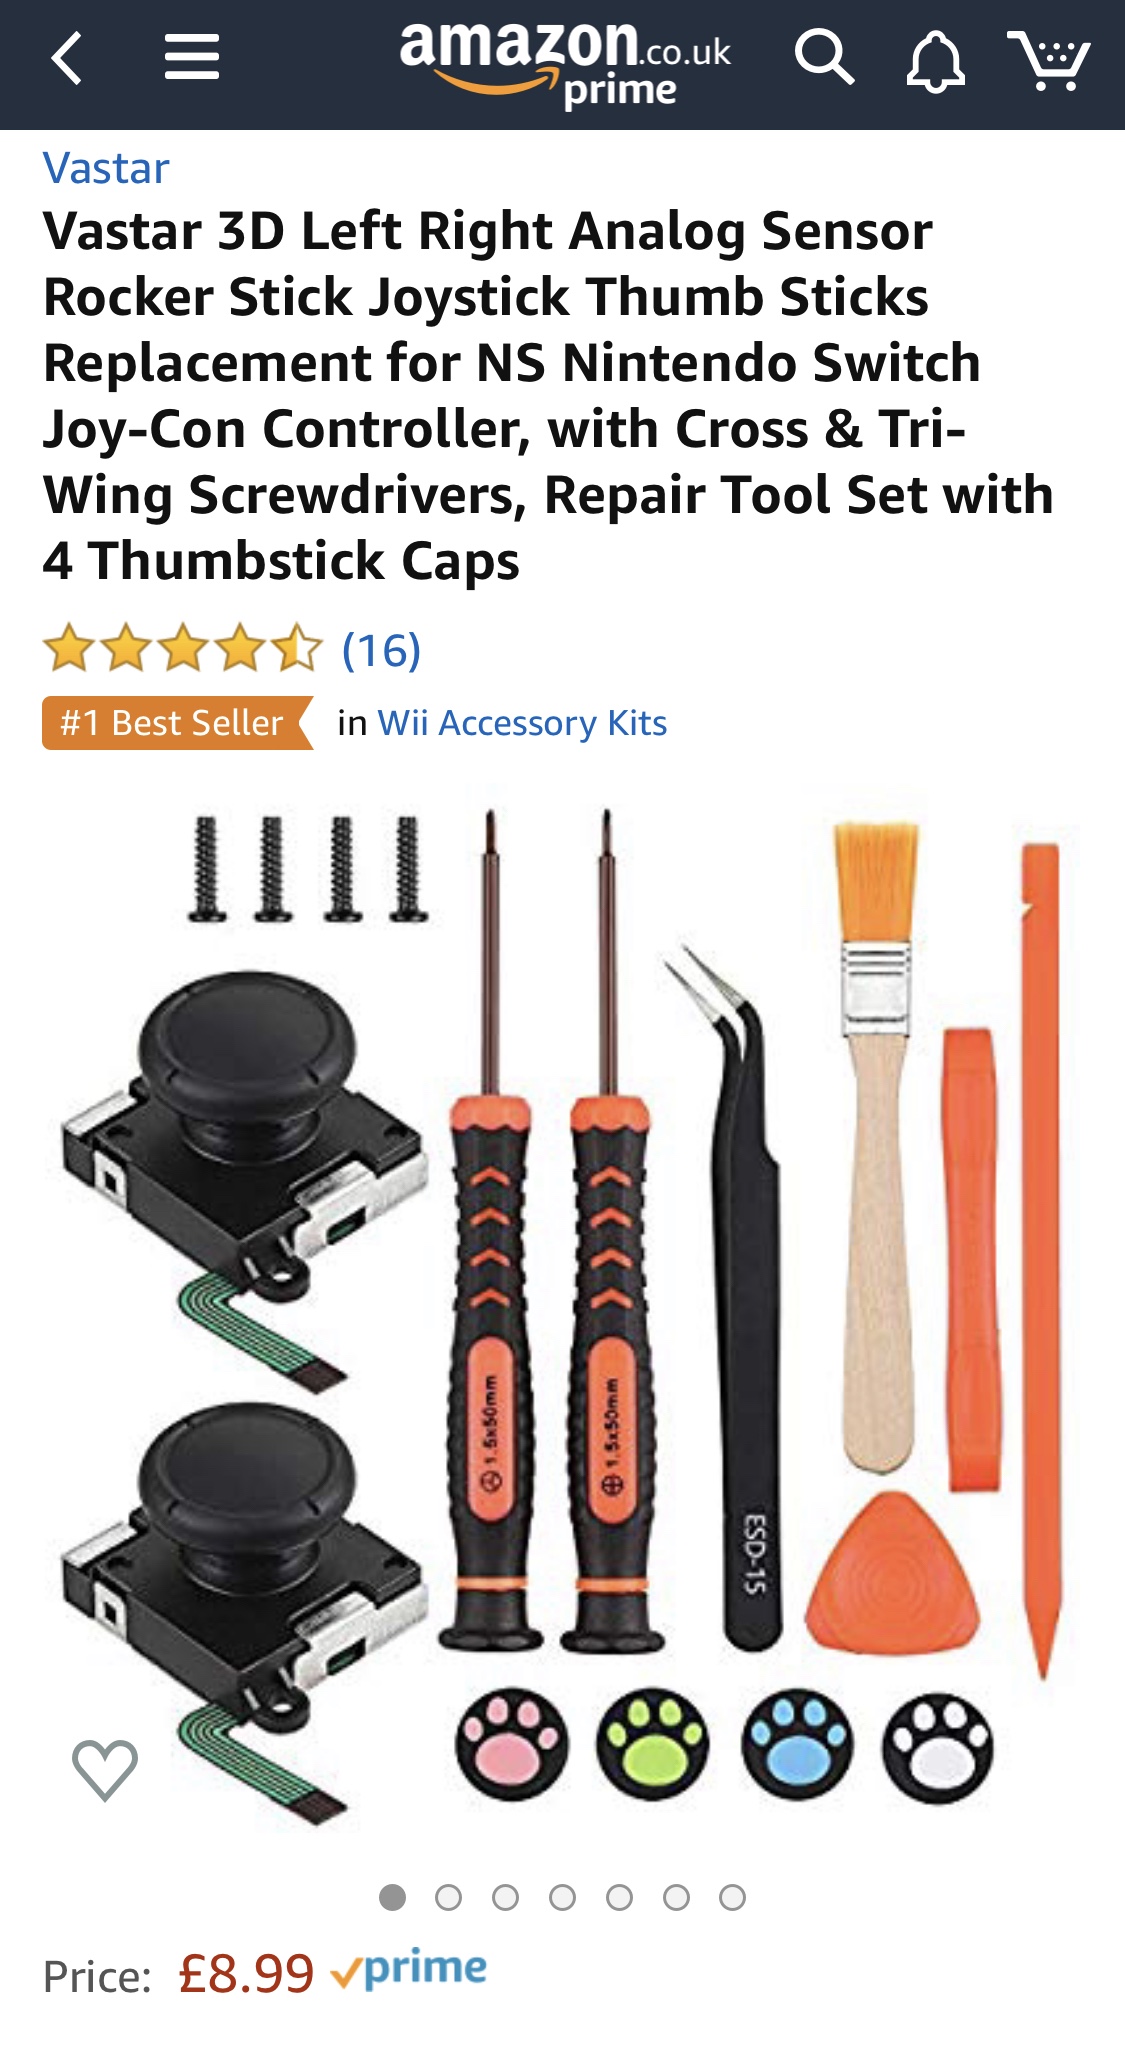
So I thought I’d have a go at repairing the joycon with a replacement drifting stick which you can purchase on Amazon or eBay for relatively cheap.
Getting the right tools for the job
The first thing to note here is that you need a particular type of screwdriver, a cross and tri-wing of the right size. The tri-wing is pretty unusual and I didn’t have one, however you can find some great kits on Amazon that include the tools as well as the replacement parts. I got mine for £8.99 delivered.
Steps
- Remove the cover from the joy con.
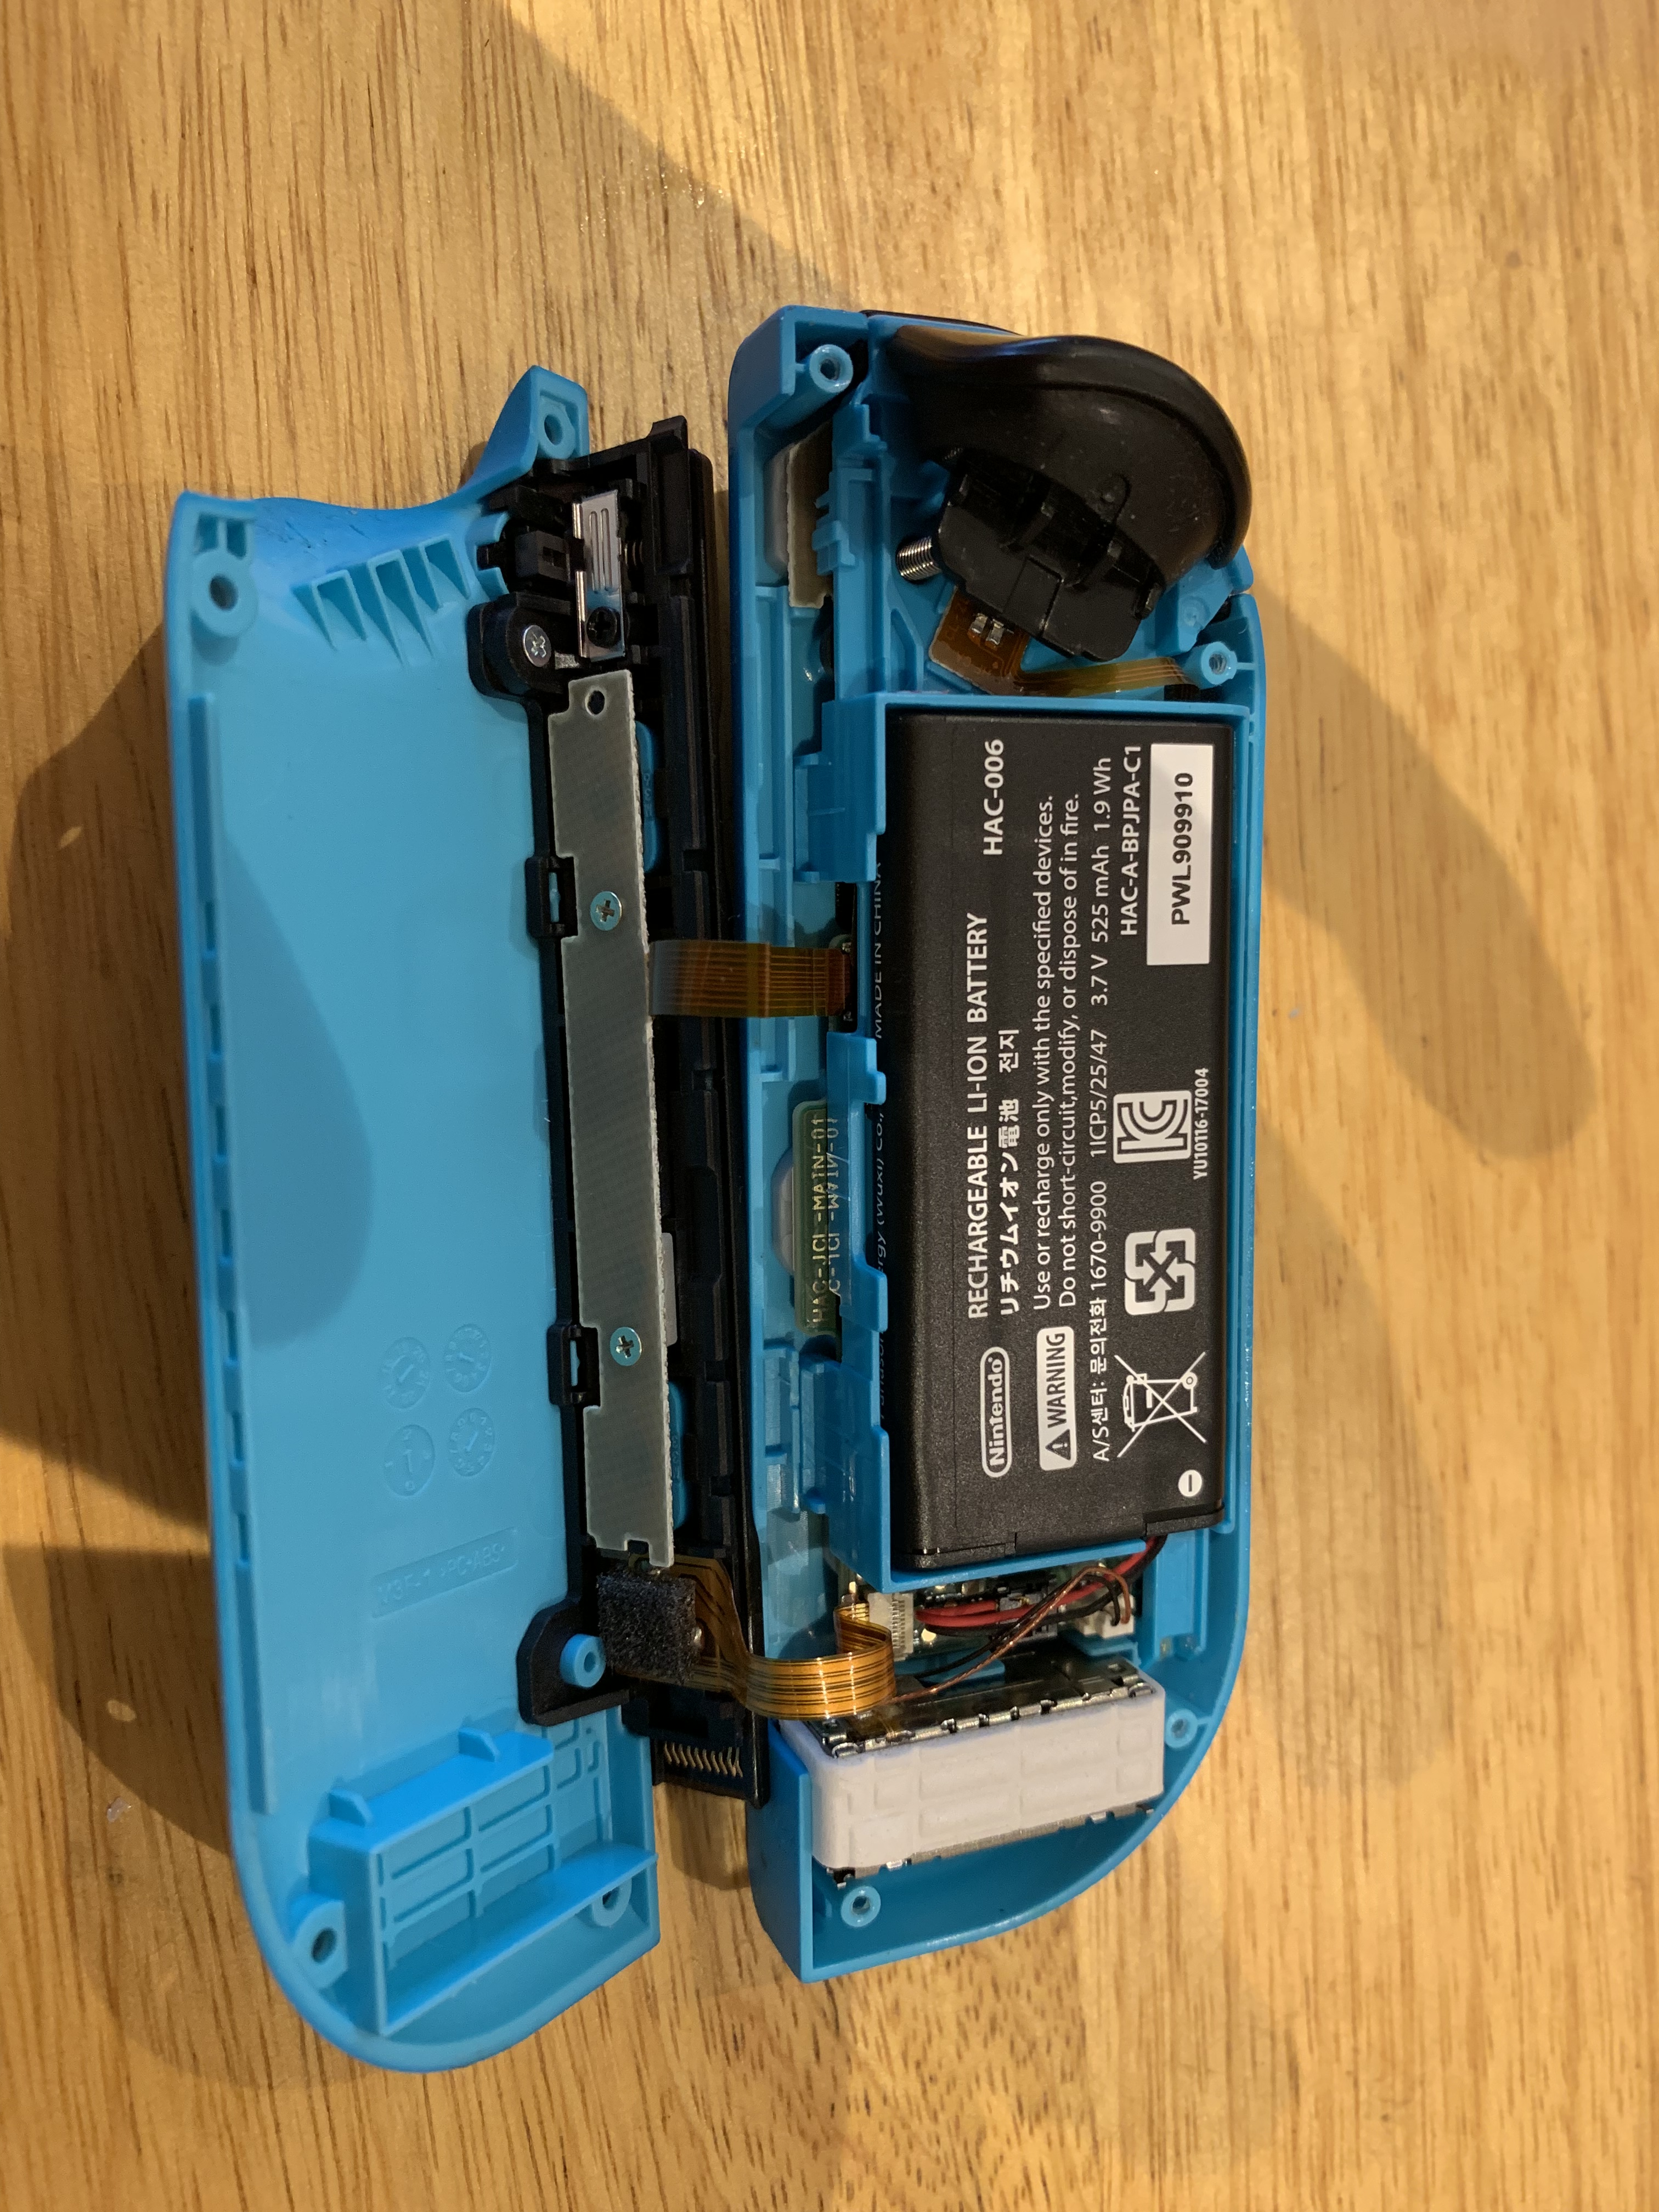
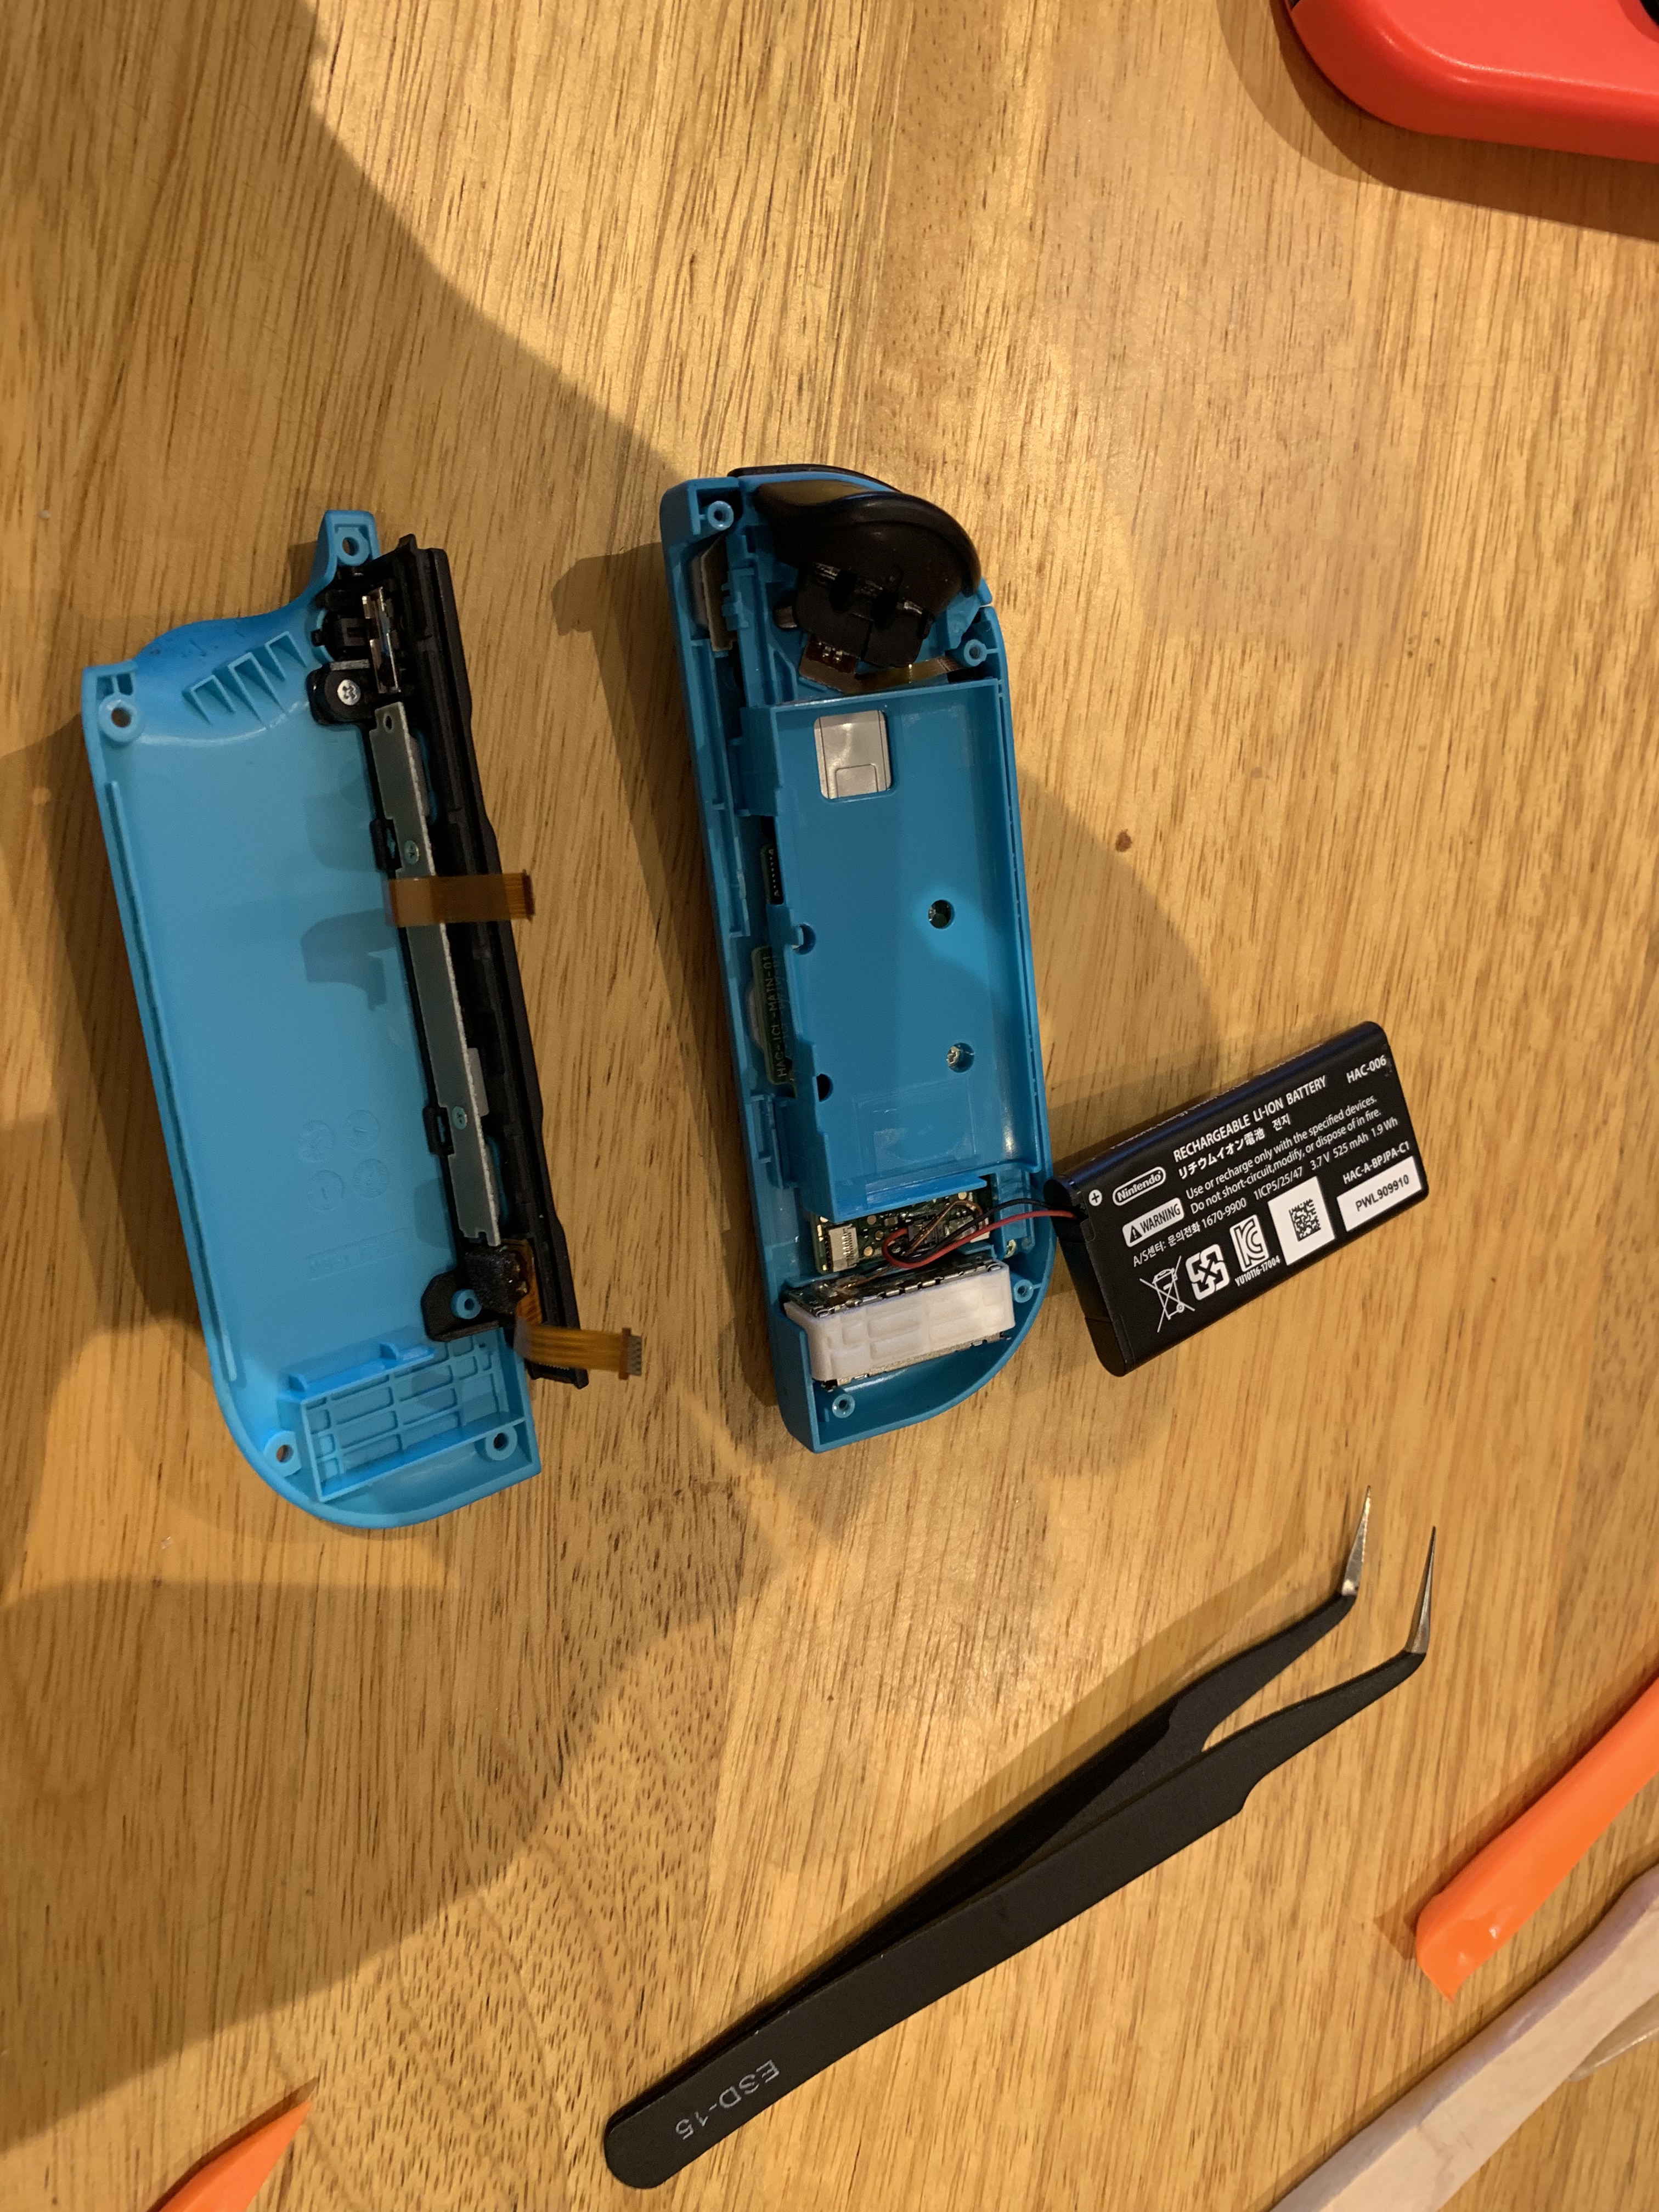
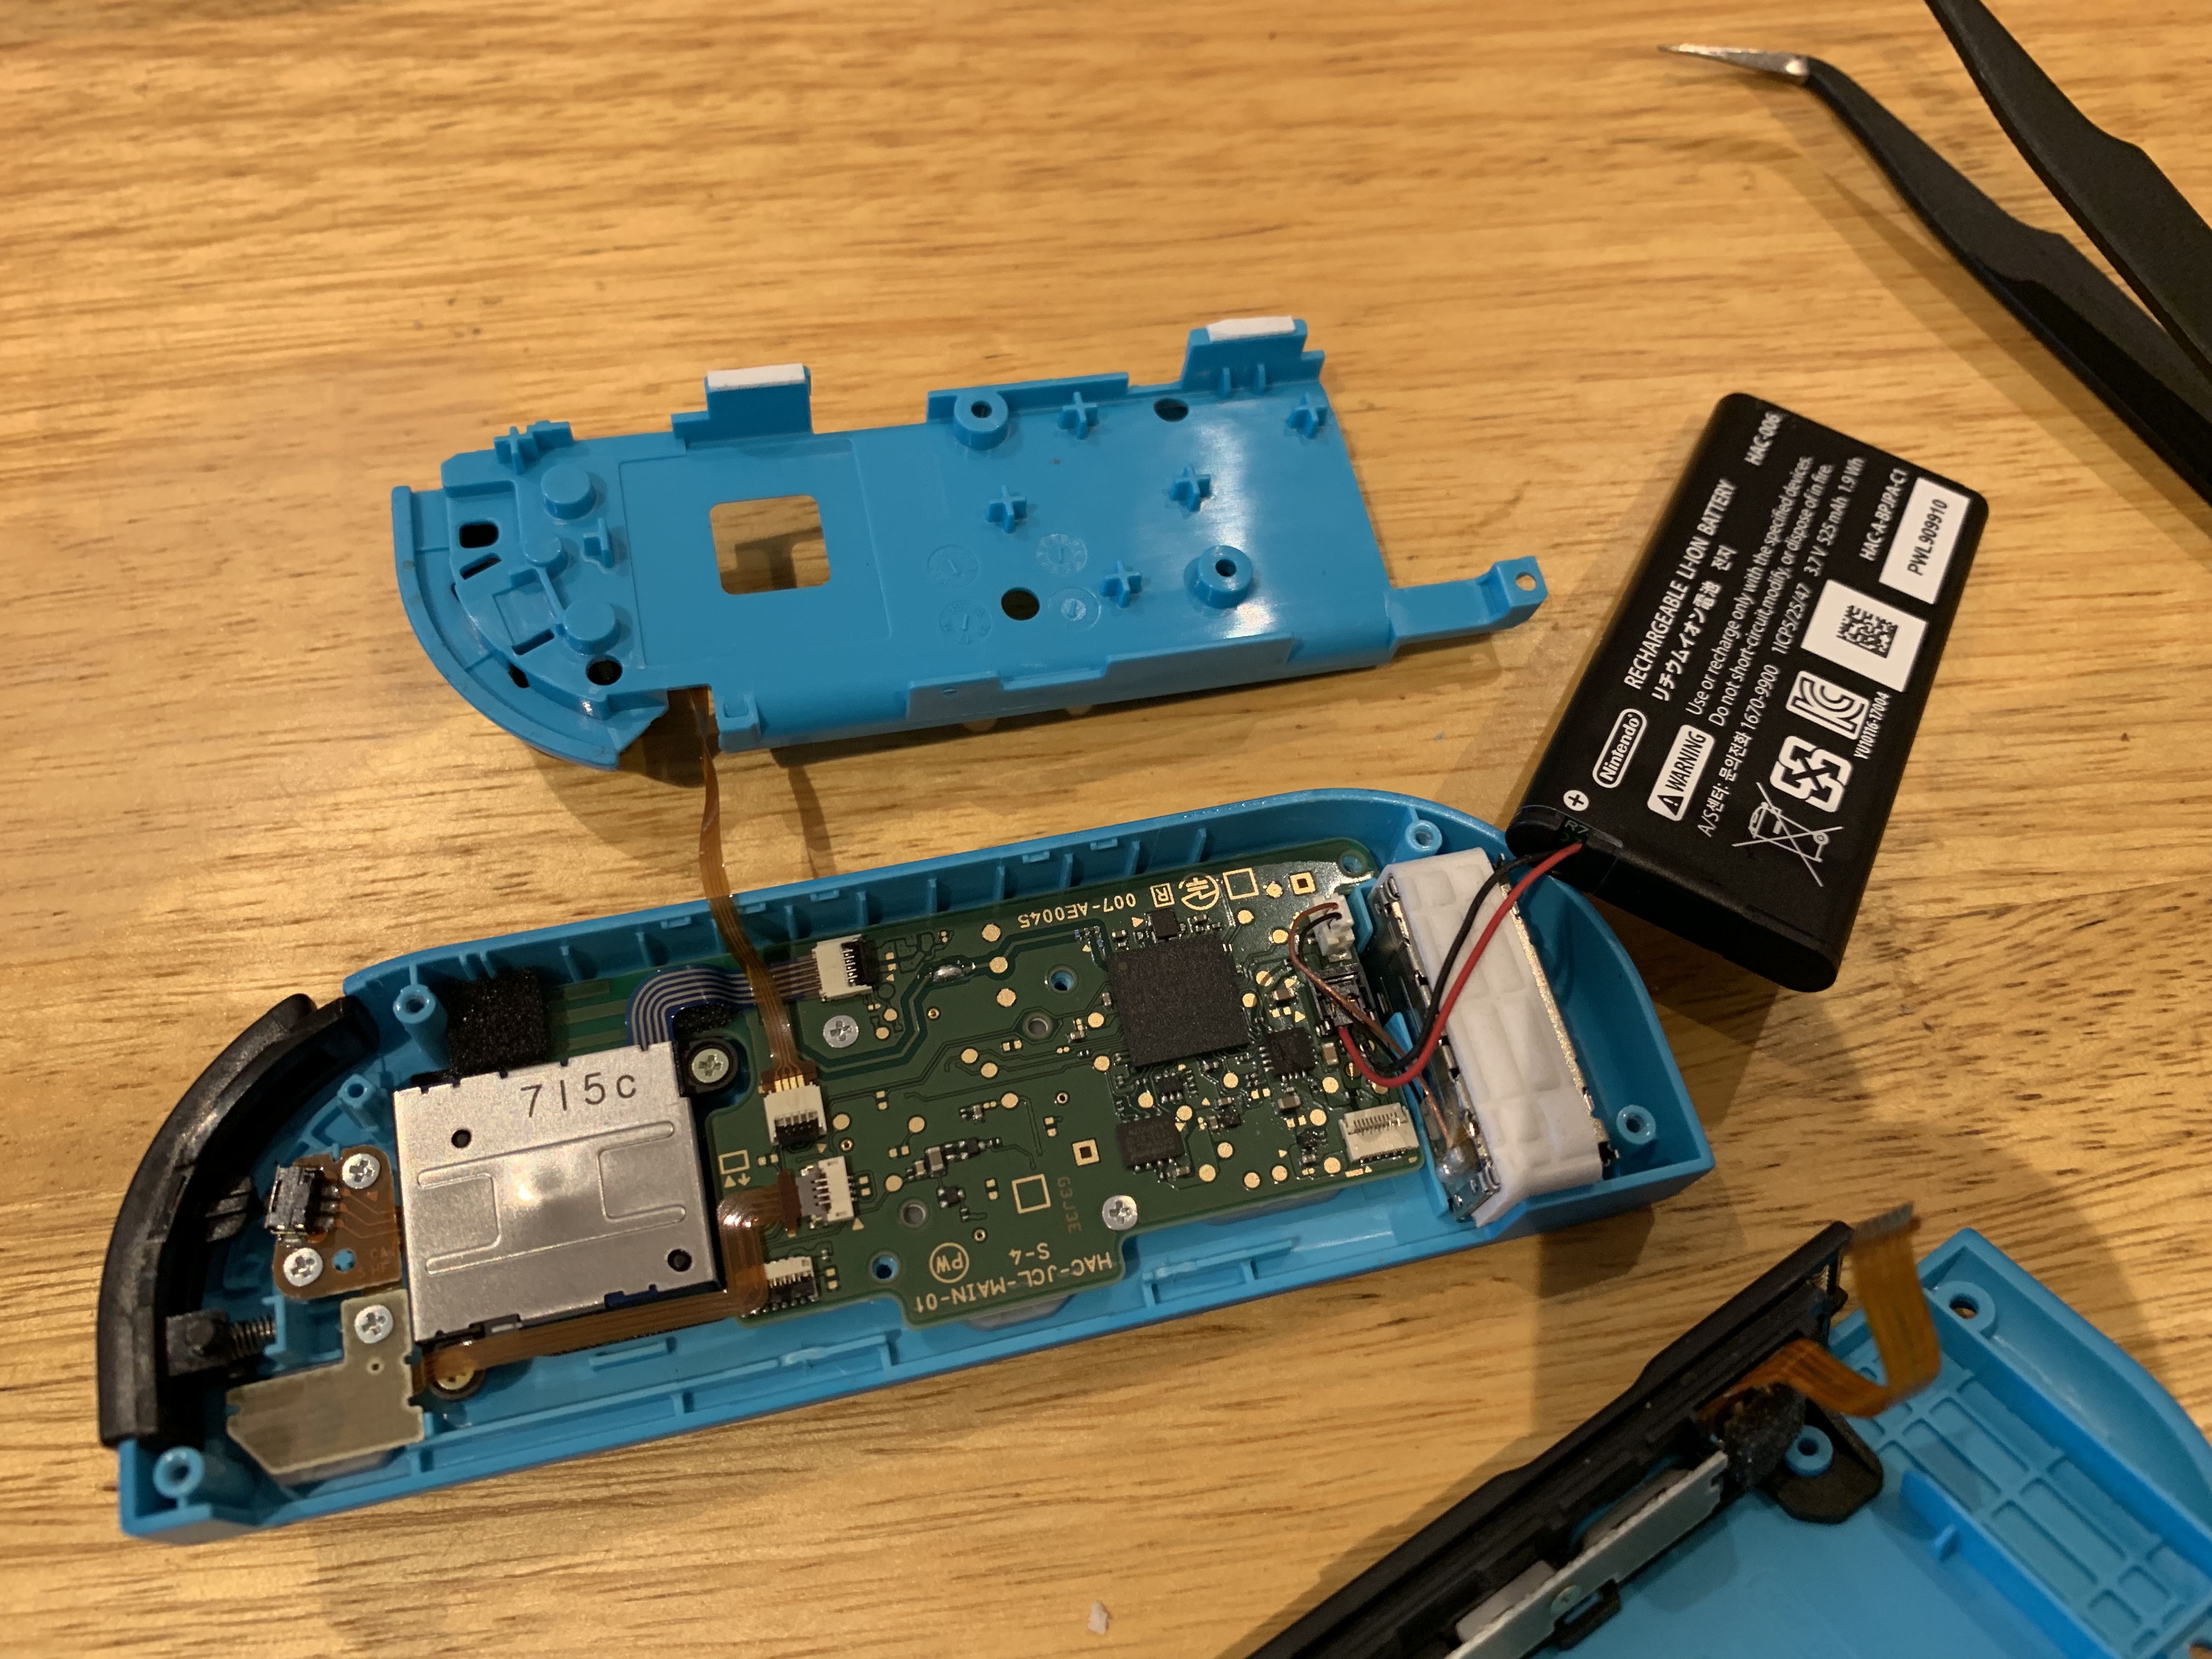
- Carefully remove the visible connections from the cover and remove the battery as shown below.
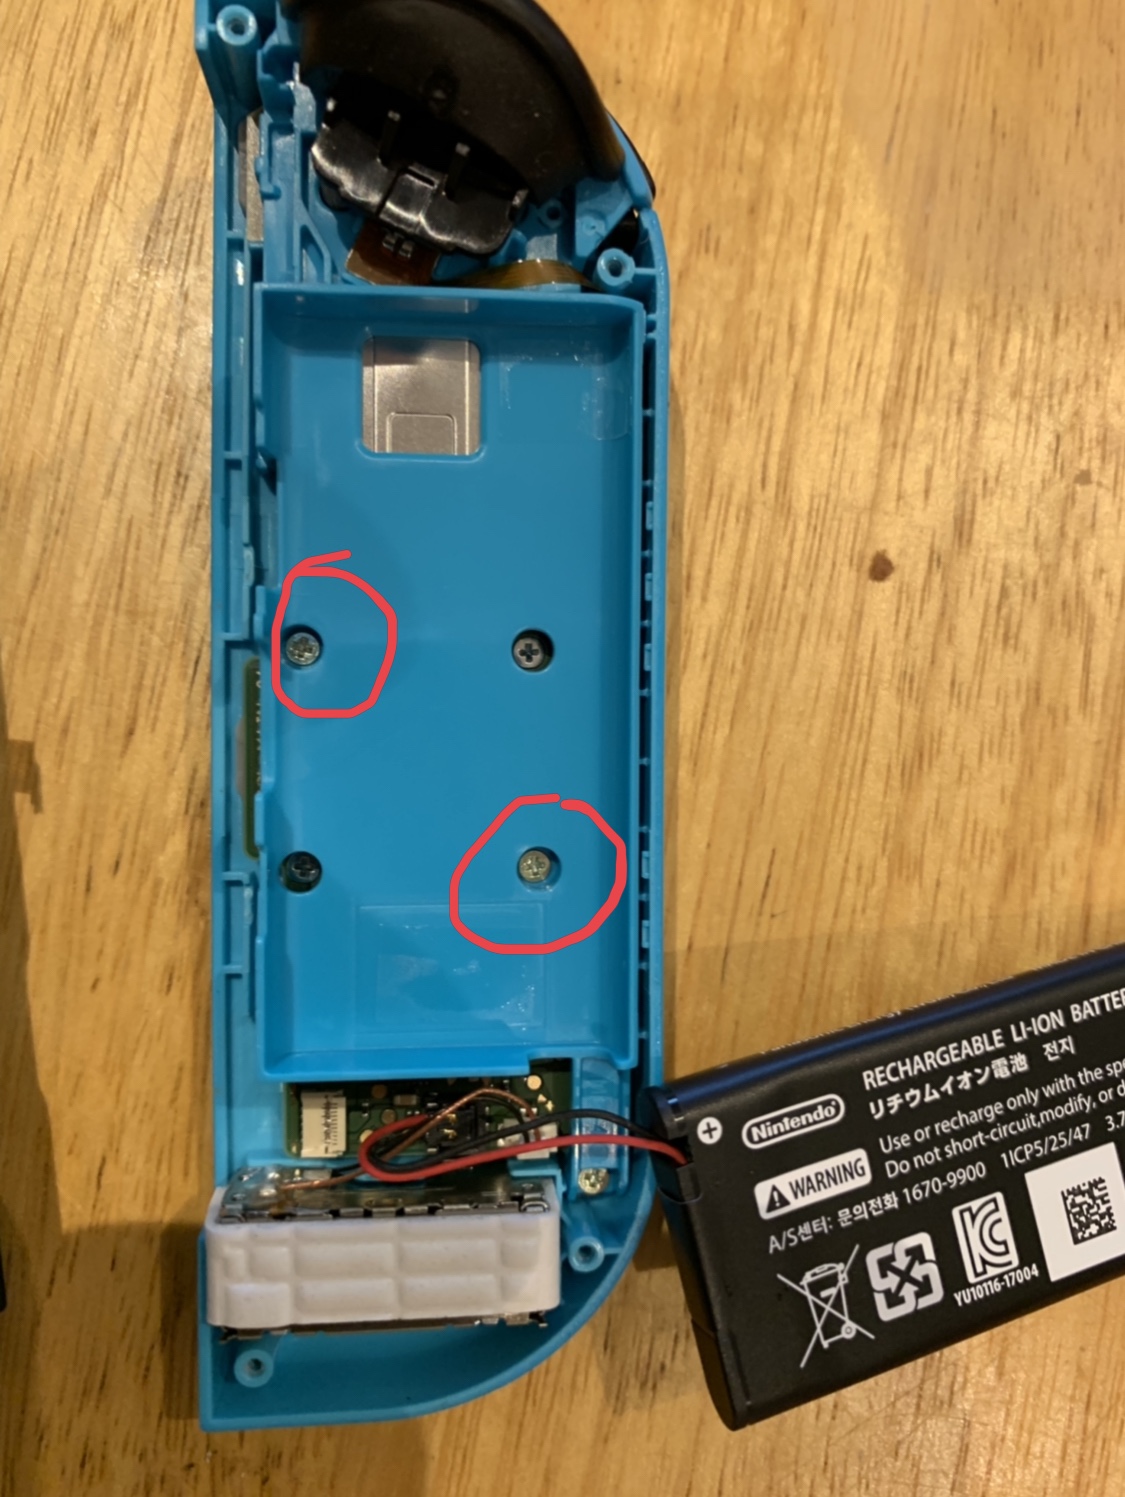
- Important! Now only remove 2 screws, circled below, otherwise the joycon will open up way more than we need.

- Remove the plastic layer and lay it face down adjacent to the exposed circuit board. Notice the silver square on the left? That’s our drifting stick unit.
- Remove the screws and carefully remove the two tape connectors. The one at the top is connected the the drift unit. The one at the bottom needs to be removed to access the locking screw.


- Add the new unit, reconnect both tape connections.
- Put the joy con back together, you can test the connections are clean by pressing the buttons as you build it and seeing the green connection lights.
There you have it, good as new.
