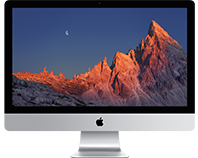
It is possible, and free, with a caveat. My workaround uses Windows 10 screen projection.
I’ll begin this explaining the caveat before explaining the method, the solution I found as a workaround uses wireless projection. I found there was little to no lag for extended periods and use this solution when developing using my windows laptop and the 27 inch iMac 5k 2015 as a secondary monitor.
A cable connection is not possible in models after 2014 due to Apple dropping support for Target Display Mode, an unpopular move, and one which makes my workaround necessary. If you’ve reached this I’m sure you’ve already trawled the Apple community forums and found answers such as “Impossible”, “Not supported”, and general frustration towards Apple for dropping the feature. For Apple’s own explanation and supported models read more on their website (https://support.apple.com/en-us/HT204592), but if you have a model from late 2015 onwards with the 5K retina display, I recommend taking a look at my workaround which takes the “impossible” from several Apple forum posts and get’s you 95% of the way there. The obvious concern is lag, but I found little to no lag over extended periods of use.
Method
What you’ll need;
- USB Mouse and Keyboard
- Updated Mac OS x and Bootcamp (included in your Mac OS x installation)
- Windows 10 ISO (Free download then optional licensed or free alternative explained below)
Prepare your iMac.
- First you’re going to need a copy of Windows 10. Download the relevant 32/64 bit ISO from the official Microsoft website.
- Spotlight search for “Bootcamp” which is included in your Mac OS x installation. Open and follow the steps to create a partition for Windows. Obviously the larger the partition you can commit the better, and beware the size of Windows update files. I went with 200gb for mine, but depending on your intended usage you can go much less.
- You will then be prompted to select your Windows 10 ISO file you’ve already downloaded, then just run through the install.
- Note: You can either use a standard license or you will notice during the install Microsoft give you a free option in exchange for sharing usage data.
- Your iMac will reboot to complete the installation.
- This is where you may need your backup USB mouse and keyboard. Your new Windows 10 installation may not recognise your Apple Magic mouse and keyboard at this stage. You can configure these later in your “Bluetooth & other devices” area in settings.
Prepare your Windows 10 install on your iMac.
- You will then be prompted by Bootcamp to install some support files to ensure your Windows 10 install runs smoothly in your iMac environment.
- Ensure that your Bluetooth is switched on in settings.
- Go to the “Optional Features” area in your settings and install the “Wireless Display” feature.
- Once setup is complete go to Display Settings > Projecting to this PC.
- Copy the settings below, note that I found the power source setting only worked when set to “off” for me, even though my iMac was plugged in the whole time.

2. Next launch the “Connect app” to make your iMac Windows 10 installation visible on your network.

Your Windows computer
- Ensure your Bluetooth is enabled and head to your display settings. Select “Connect to a wireless display”.

2. Select your iMac device, your preferred scaling and resolution and voila, you’re now using your iMac 2015+ as an extended display.
You have a few options to adjust settings for intended usage. I expected quite a bit of lag compared to a standard extended display, but I have very little, I tested using my development environment with no issues, and video streaming had little to no lag.

Other tips
If your Bootcamp installation is failing to reboot back into MAC OS x, as happened with me, just hold “Option” on your keyboard when powering on and you can select which operating system to boot into. Bootcamp will always boot into the last active OS.